
farawayvillage
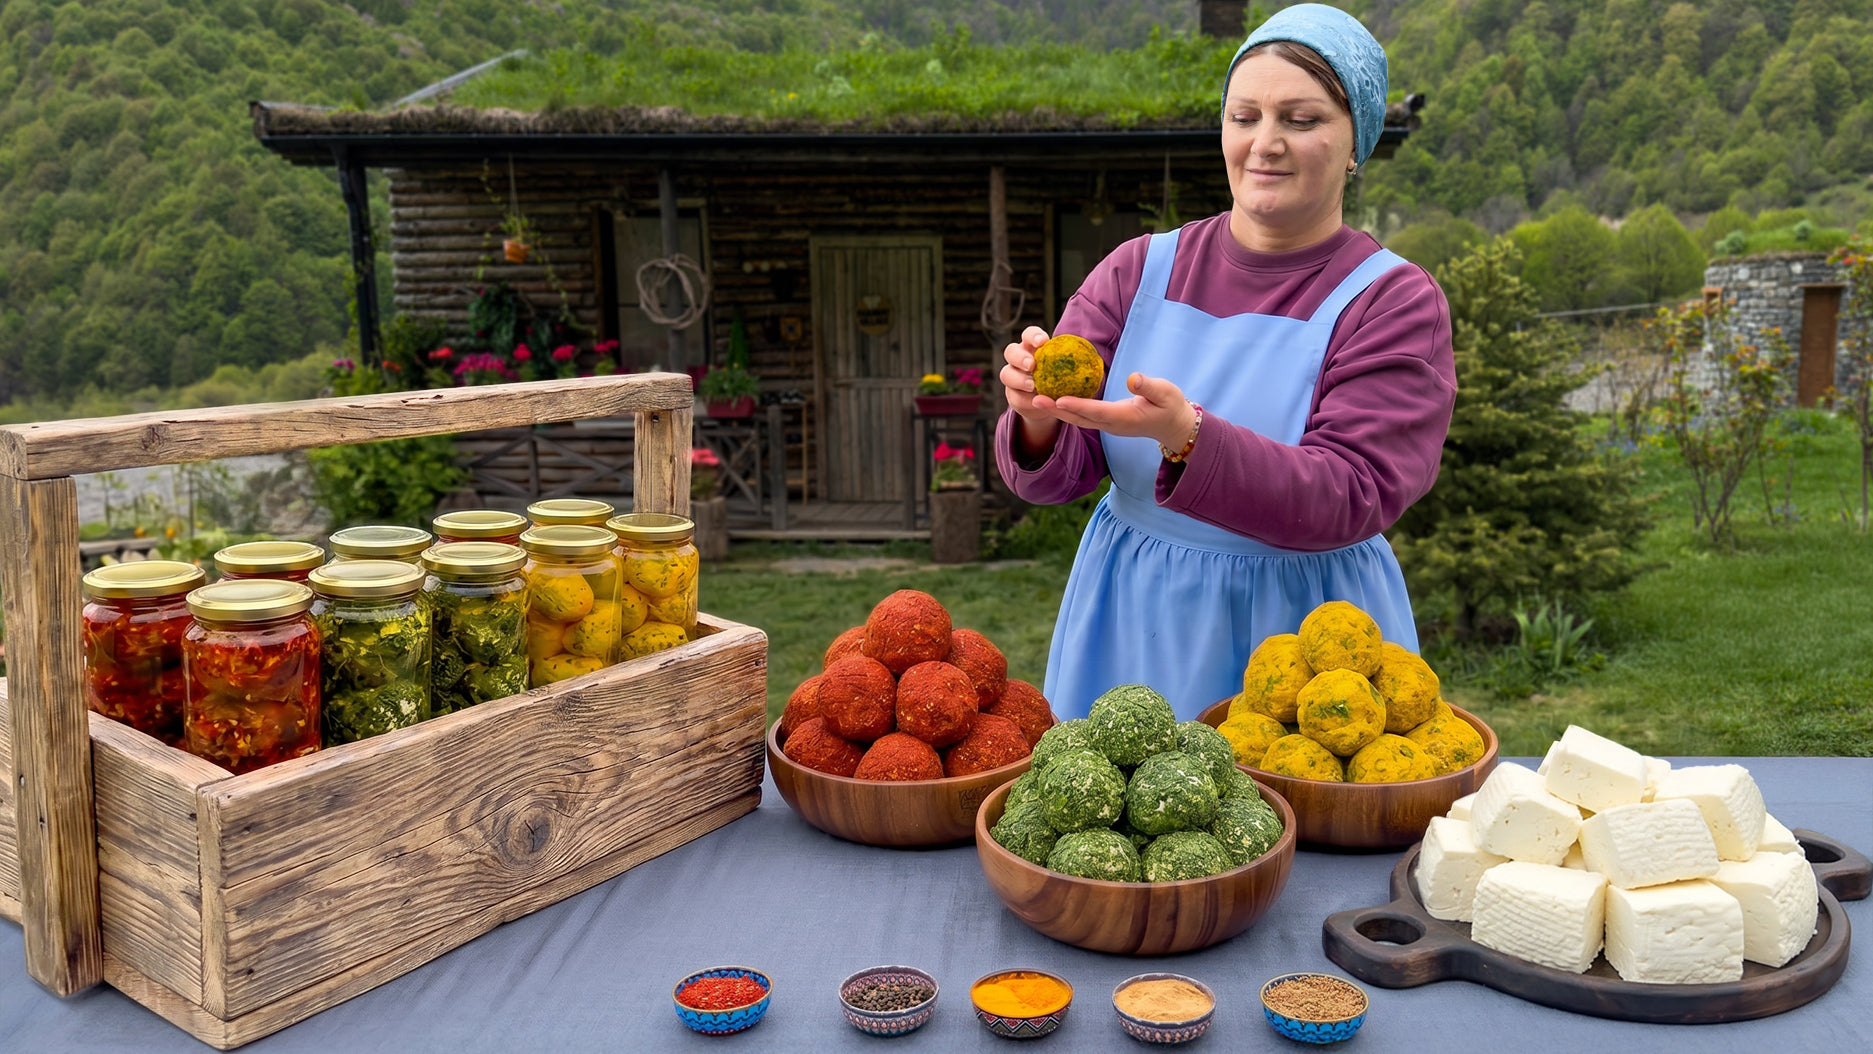
Traditional Azerbaijani Village Breakfast: Homemade Strained Cheese Balls in Oil, Flaky Qatlama Pastry & Clay Pot Bread
Learn how to make traditional village strained cheese balls in oil, crispy layered flaky qatlama pastry, and rustic clay pot baked bread at home.
👤 Faraway Village📖 farawayvillage
🥘 Ingredients
Check off ingredients as you prepare them:
🍳 Cookware
- ●pot
- ●wooden spoon
- ●colander
- ●bowl
- ●mixing bowl
- ●knife
- ●frying pan
- ●pan
- ●whisk
- ●oven
📝 Preparation Steps
1
Heat the whole milk in a large pot over medium heat until it reaches a gentle boil.
2
Remove the pot from the heat source and allow the milk to cool slightly to around 45°C. Stir in the plain yogurt thoroughly to introduce the starter culture.
3
Cover the pot tightly with a lid, wrap it completely in a thick insulation blanket, and let it sit undisturbed in a warm place for 8 to ⏱️ 12 hours until a firm curd sets.
4
Cut through the set cultured curd using a long wooden spoon to encourage the separation of curds and whey.
5
Line a large colander with several layers of clean cheesecloth and carefully ladle the curds into it.
6
Gather the corners of the cheesecloth, tie it securely into a bundle, and hang it over a basin to drain the whey completely for 5 to ⏱️ 6 hours until the cheese curd is dry and firm.
7
Transfer the strained cheese curd to a bowl and season it evenly with the sea salt.
8
Divide the seasoned cheese curd into three equal portions. Keep the first portion plain, mix the finely chopped fresh herbs and ground black pepper into the second portion, and fold the finely crushed walnuts and honey into the third portion.
9
Roll the different cheese mixtures into small, uniform balls using the palms of your hands.
10
Coat the plain cheese balls completely in the crushed red pepper flakes, roll the herb cheese balls in additional chopped herbs, and roll the sweet honey-walnut cheese balls in extra crushed walnuts.
11
Carefully arrange the seasoned cheese balls into separate clean glass jars, pour in the olive oil until they are completely submerged, and seal tightly for storage.
12
In a large mixing bowl, combine the all-purpose flour and salt. Gradually pour in the warm water while mixing by hand until a cohesive dough forms.
13
Knead the dough on a lightly floured surface for 8 to ⏱️ 10 minutes until smooth and elastic, then cover it and let it rest for ⏱️ 20 minutes.
14
Divide the rested pastry dough into 6 equal portions and roll each portion into a smooth ball.
15
Using a thin rolling pin, roll out each dough ball on a floured board into an ultra-thin, circular sheet.
16
Generously brush the top surface of the first thin dough sheet with melted ghee. Place a second rolled sheet directly on top of it and brush it with more ghee. Repeat this precise layering process for all 6 sheets.
17
Using a sharp knife, cut the stacked, layered dough circle into long parallel strips approximately 3 cm wide.
18
Take each individual strip and roll it up tightly from one end to the other to create a coiled, rosette-shaped pastry disk. Press the outer end securely into the side to seal the layers.
19
Heat the vegetable oil in a deep frying pan or wok over medium heat until it reaches frying temperature.
20
Carefully lower the coiled pastry disks into the hot oil and fry for 4 to ⏱️ 5 minutes per side, turning occasionally, until the layers puff up and turn golden-brown and crispy.
21
Remove the pastries from the hot oil, drain them briefly on paper towels, transfer to a serving platter, and dust generously with powdered sugar while still warm.
22
Dissolve the active dry yeast in the warm water and let it sit undisturbed for ⏱️ 5 minutes until frothy.
23
In a large mixing bowl, whisk together the bread flour and salt. Pour in the activated yeast mixture and stir until a sticky dough forms.
24
Knead the dough vigorously for ⏱️ 10 minutes until it becomes smooth, satiny, and no longer sticks to your hands. Shape it into a ball, cover with a damp cloth, and let it rise in a warm spot for 1.⏱️ 5 hours or until doubled in volume.
25
Punch down the risen bread dough and divide it into equal portions corresponding to the number of your earthenware clay baking pots.
26
Lightly oil the inside of each clay pot and dust with a small amount of flour to prevent sticking. Place a portion of dough into each pot.
27
Cover the clay pots loosely and allow the dough to undergo a second rise for ⏱️ 30 minutes.
28
Whisk the egg yolk in a small cup and brush it evenly over the top surface of each risen loaf.
29
Sprinkle the tops of the loaves generously with a combination of sesame seeds and nigella seeds.
30
Use a clean razor blade to score shallow decorative patterns across the top of each seasoned dough piece.
31
Preheat your conventional oven or traditional stone hearth to 220°C.
32
Bake the clay pots uncovered for 30 to ⏱️ 35 minutes until the bread is deeply golden-brown and sounds hollow when tapped on the bottom crust. Turn the loaves out of the pots and let them cool slightly before serving fresh.
Reviews & Ratings
Share your thoughts and feedback about this recipe
Write a Review
Community Feedback
0 ReviewsLoading reviews...