
amberskitchencooks5.0
Crusty Dutch Oven Sourdough Bread
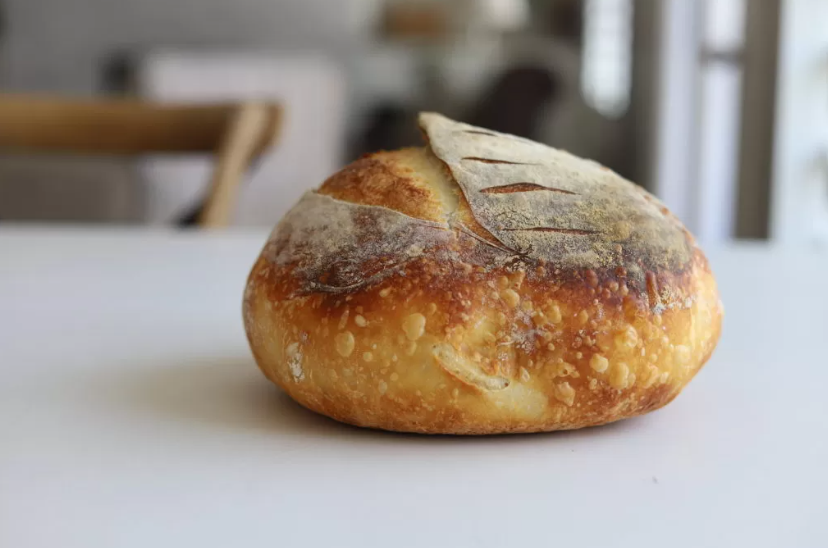
This iconic Sourdough crusty artisan loaf is a thing of beauty. Crusty on the outside, delicate soft crumb on the inside. Only 4 humble ingredients combine to make this classic masterpiece.
👥 1 Servings⏱️ Prep & Cook: 1h 30m⏳ Prep: 45 min🔥 Cook: 45 min👤 Amber📖 amberskitchencooks
🥘 Ingredients
Check off ingredients as you prepare them:
🍳 Cookware
- ●bowl
- ●whisk
- ●oven
- ●dutch oven
📝 Preparation Steps
1
Activate your starter. Activate it using whatever ratio works best for your schedule. You will just need a total of 125 grams of starter, which is about one volume cup. If you need help figuring out how to activate your starter you can use this ratio: in a jar combine 1/4 cup runny discard starter with a heaping 3/4 cup flour and a tad under 3/4 cup water. Mix together until the mixture resembles a thick, pancake batter texture. (if it is too thin, add more flour. if it is too thick add more water.) This will yield enough for the recipe, plus a little extra for the reserve starter. Mark the height of starter right after the feed with a rubber band or with a dry-erase marker. Wait approximately 4 to ⏱️ 7 hours for mixture to activate, double in size and fill with bubbles in volume. When it has reached that point, work fast! It's time to move!
2
Combine water and active starter. In a large bowl, combine 390 grams of water and 125 grams of the active starter. Mix together until it becomes a milky-looking mixture.
3
Add the remaining ingredients and let it rest . Add 500 grams of flour and 12 grams of salt. Use a danish dough whisk (or your hands) to mix it all together in the bowl. The result will be a very shaggy, unsmooth, sticky mess. Clean off your fingers. Cover the dough and let it rest for ⏱️ 30 minutes.
4
Do the Stretch and folds. Come back to the dough and do your first "stretch and fold" (see note above). Repeat the stretch and folds every 20 to ⏱️ 30 minutes for a total of 4 times over two hours. You will notice the dough changes considerably in structure and strength with each stretch and fold. Make sure that the dough is covered with a lid in between the stretch and folds.
5
Bulk Ferment. Cover and let bulk ferment at room temperature until the volume of the dough has increased by 50%. This may take ⏱️ 3-6 hours depending on the ambient temperature in your house, and the strength of your sourdough starter.
6
Laminate. On a clean surface, dump dough onto countertop. Very gently "laminate" the dough. (see note above) To laminate the dough, you gently stretch the dough into a thin, rectangular layer on your countertop. Work carefully to prevent tears in the dough. Try and avoid using flour on your workspace if possible, or use only very minimal flour.
7
Preshape. With the laminated dough, fold 1/3 of the dough inward, then fold the opposite 1/3 side of the dough inward as well. With the triple layer in the center, start at one end and tightly roll it up into a wonky shaped ball.
8
Rest. Cover the wonky shaped dough ball with either a bowl or a towel and let it rest at room temperature for ⏱️ 30 minutes.
9
Shape. Using a minimal dusting of flour, or no flour if possible, use your hands to smooth the wonky shaped ball into a tight, yet smooth ball. Gently pull and turn the dough ball back and forth over the countertop to create tension, being careful that the dough does not overstretch or tear the smooth layer of dough on top of the round.
10
Transfer to Banneton. When it is formed into a tight ball, generously dust the top of the dough with flour and spread it onto the top surface of dough using your hand. If you have brown rice flour, (not necessary but helpful since it is less sticky) you can use brown rice flour instead of bread flour. Sprinkle some of the (brown rice or bread) flour on the inside of the banneton basket liner to prevent sticking. Turn the dough ball upside down and place it bottom up into the lined and floured banneton basket. Cover your banneton basket with a dough shower cap so it won't dry out.
11
Cold Proof. Transfer covered dough to the refrigerator and let it cold proof. A cold proof is helpful for both fermentation, and for ideal oven spring. Eight to Twelve hours is the ideal amount of time, however, I do often let it cold proof for ⏱️ 24 hours when convenience beats out my need for a perfectly fermented loaf.
12
Preheat. Put your Dutch oven inside of your oven with a pizza stone or a cookie sheet underneath it to prevent too crusty of a bottom. (trust me on this don't skip the cookie sheet/pizza stone under the Dutch oven!) Preheat the oven to 450 degrees Fahrenheit. Once it reaches temperature, let it stay at that temperature for at least ⏱️ 30 minutes before putting in the dough.
13
Transfer to Parchment Paper and Score. Remove the cold dough from the refrigerator. Using a sheet of parchment paper, empty dough out of banneton so it is right-side-up (floured side up) on the parchment paper. Using a sharp Lame blade, confidently score the top of the dough in a crescent shape, or in whatever shape or design that you like. Scoring not only adds decoration to the top of the loaf, but more importantly it gives the steam somewhere to go, which means it will help the dough lift UP instead of OUT, making a beautiful oven spring.
14
Transfer to Dutch oven and Bake. Carefully remove the hot Dutch oven from the oven, open the lid and using the corners of the parchment paper, lift the dough into Dutch oven and put the lid back on. Put it back into the oven and Bake at 450° F for ⏱️ 30 minutes. Then remove the lid and bake another ⏱️ 10-15 minutes or until the golden crust has achieved the right color. Remove immediately.
15
Let Cool. Set the hot loaf onto a cooling rack and let it cool for at least one hour before slicing into it. (Waiting is the hardest part of the whole process!) If you cut into it early, the still hot tender crumb will tear and turn to mush. I know it's tempting, but trust me. Just wait!
16
ENJOY! Slice into the bread and enjoy with softened grass fed butter, with olive oil and vinegar, or in whatever way you would like. Close your eyes and savor every bite! ENJOY!!!
Reviews & Ratings
Share your thoughts and feedback about this recipe
Write a Review
Community Feedback
0 ReviewsLoading reviews...